
Separate stateful infrastructure with Serverless Compose

serverless developer & architect at Elva
One of the most significant benefits of serverless is that the development teams can fully own and manage all of their infrastructure themself. Keeping all of that infrastructure in the same CloudFormation stack can sometimes be troublesome however, and there are many reasons why you might consider having parts of it in a separate stack. A common approach is to keep stateful infrastructure, such as your DynamoDB tables or S3 buckets, in one stack, and stateless infrastructure, such as your Lambda functions or API gateways, in another. This way, you can more freely update or even tear down the stack that's naturally often changing while not risking affecting the long-living infrastructure that your application depends on. But on the other hand, that can lead to complex deployment orchestration or overcomplicated mono repo setups just to be able to deploy your stacks in the correct order with the right dependencies. This post will show you how you can use Serverless Compose to easily separate your stateful infrastructure into a separate stack and deploy it without the hassle!
♫ Serverless Compose
Serverless Compose is a feature of the Serverless Framework that simplifies orchestration and configuration when you have multiple related CloudFormation stacks. Apart from providing a simple configuration format for orchestrating and defining the services and their respective dependencies, it also provides CLI tooling to interact with those services once deployed, for example to stream the logs of those services directly to your stdout at the same time.
🎹 Composing an Application
The first thing we're going to need is a serverless-compose.yml file in the root of our project. This file will contain the configuration that instructs Serverless Compose what services (CloudFormation stacks) our application will consist of and how their deployments should be orchestrated. In an empty directory, create a file called serverless-compose.yml and list two services in it, one called infrastructure and one called application.
services:
  infrastructure:
    path: infrastructure

  application:
    path: application
The infrastructure service will contain our stateful infrastructure, which in this case will be a DynamoDB table, while the application service will contain stateless resources, in this case, a Lambda function.
Let's start by implementing the infrastructure service by creating a subdirectory called infrastructure. Inside that directory, add a serverless.yml file and add the configuration to set up a DynamoDB table:
service: infrastructure

frameworkVersion: '3'

provider:
  name: aws

resources:
  Resources:
    DynamoTable:
      Type: AWS::DynamoDB::Table
      Properties:
        AttributeDefinitions:
          - AttributeName: id
            AttributeType: S
        KeySchema:
          - AttributeName: id
            KeyType: HASH
        BillingMode: PAY_PER_REQUEST
        TableName: dunder-mifflin-clients
  Outputs:
    TableName:
      Value: !Ref DynamoTable
Note that we've added an Outputs field that contains the name of the DynamoDB table. We can use this output to easily pass parameters between our services without having to specify the same properties in multiple places or storing them in a parameter store. To inject this property as a parameter in the application service, add a parameters field to the service definition in the root serverless-compose.yml file, referring to the output of the infrastructure stack
services:
  infrastructure:
    path: infrastructure

  application:
    path: application
    params:
      tableName: ${infrastructure.TableName}
Next, it's time to implement the application service. Again, in the root of the project, create a subdirectory called application and add a serverless.yml file:
service: application

frameworkVersion: '3'

provider:
  name: aws
  runtime: nodejs14.x

functions:
  hello:
    handler: handler.hello
        environment:
        TABLE_NAME: ${param:tableName}
This configuration defines a Lambda function called "hello" that takes a TABLE_NAME as an environment variable. That variable is filled by the parameter we injected with the value from our infrastructure service.
To complete the application service, add the Lambda function handler.js
module.exports.hello = async (event) => {
  return {
    statusCode: 200,
    body: JSON.stringify(
      {
        message: `I see you ${process.env.TABLE_NAME} 👀`,
        input: event,
      },
      null,
      2
    ),
  };
};
Finally, we don't want to risk our application service accidentally being deployed before our infrastructure service in case we do any changes to the DynamoDB table that in turn requires code changes to our application service. We can make sure we always deploy the infrastructure service first by specifying that the application service depends on the infrastructure service:
services:
  infrastructure:
    path: infrastructure

  application:
    path: application
    params:
      tableName: ${infrastructure.TableName}
    dependsOn: infrastructure
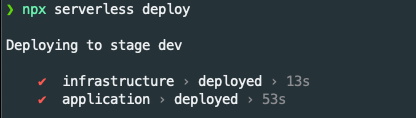
We're now ready to deploy our application! In the root of the project, run npx serverless deploy 🚀
If you enjoyed this post and want to see more, follow me on Twitter at @TastefulElk where I frequently write about serverless tech, AWS, and developer productivity!
Elva is a serverless-first consulting company that can help you transform or begin your AWS journey for the future